Monday, December 27, 2010

A Very Merry Christmas

We are so lucky to have my family who lives here in VA AND Greg's family who are now in FL here to celebrate Christmas with us.  I couldn't have asked for better parents or in-laws, I know that is a rare treat, and one I sure don't take for granted!

I did a little Christmasting up of our house before everyone arrived, starting with our mantle.
The framed horse is a pencil drawing done by Greg's grandfather, we love it and it stays in place even through Christmas!  I added red Root candles along with some darker burgundy ones I had for some color variation.  Our garland is artificial and pre-lit but I added fresh magnolia to bulk it up and give some texture and height to the mantle.

The lighting of the tree is a BIG deal for me.  With all my years of Christmas decorating I can light a mean tree, our 7 1/2' Frasier Fir typically has about 1,100 lights, that's right, my general guideline is a minimum of 100 lights per foot of tree and then some for good measure:)  We didn't even need lamps on in the living room!  Ha, just kidding, well, partly...

All done!  I start with the gold Abaca deep in the tree to add some light, sparkle and texture.  We add ornament after ornament until we've gotten through our boxes.  It's so nice to look through our treasures we've collected over the years and to add the things that were passed down. 
Please meet the newest addition to our lives, they were a joint anniversary present and we've had them a little over a month and are IN LOVE!!  Pips, the girl is on the left and Fawkes the boy is on the right.  We rescued them from the shelter and couldn't have gotten better kittens!
Our table all set for Christmas dinner.  The silver urn was a family heirloom on Greg's side and we're thrilled to have it, I added fresh greens to it as the table centerpeice.  It's filled with Magnolia, Boxwood, Cedar and Arizona Cypress.  The brass candlesticks were my MIL's and she's passed them down, so I included them, personally I like mixing metals so they were "in" for me for Christmas.
I made 6 of these mini-centerpeices in Jefferson cups, also passed down.  They're a mix of boxwood, white carnations and white mums.  Simple, clean and low so we could see our guests!

I hope you and your families had a wonderful holiday.  Please do share what your traditions are!  And thank you to all who read my blog, comment and even those who don't.  I know you're there :) and appreciate your kind words, support and encouragement.

*Amy

Tuesday, December 21, 2010

Amaryllis

As I'm sure you have guessed by now I have a SLIGHT addiction to plants, I guess being a Landscape Designer does that to you...  Yes, there are worse things to be addicted to, but these consume a LOT of space in our house, well mostly our kitchen.

We did a little transplanting of our Amaryllis collection so they will have room to grow and bloom.  The Amaryllis originated in South America's tropical regions and has the botanical name Hippeastrum.  I love to have them in my house for the holiday's.  Ideally I would have transplanted them earlier, BUT it is what it is, and so they're happy now and should bloom in about 4-6 weeks.
I removed the bulb from it's old soil and gently teased the roots.  They DO like to be a little crowded in their containers, but not root bound.  So ideally you should re pot them yearly.
You should have about an inch of soil between the edge of the bulb and the edge of the container.  Their "shoulders" should be exposed, so 2/3 of the bulb below soil, 1/3 above.  I press the soil in nice and tight so when I water I don't have to add more soil. 
I did a few containers with multiples for bigger effect and also to save some space on my shelves.  The bulb on the left is the "parent" bulb, the little one to it's right is it's "baby".  It sent off an offshoot that had its own root system, so I gently pulled it apart and put them in the pot together. 
Here is a beautiful photo of a cultivar called "Aphrodite" from White Flower Farm.  I love the red tinged tips and the double blooms, so soft! 
This beauty is called "Red Peacock" also from White Flower Farm.  Again, LOVE the double blooms and that deep red color.  There are tons of cultivar's to choose from, white, pink, red, salmon, doubles, singles, so there really is one for every household or occasion.

Here are a few quick tips:

•Ideal planting Period: October until the end of April (or November if you're me-whoops!)


•Flowering Period: Late December until the end of June (probably January for the ones I just did...)

•Flowering time is 7-10 weeks (a good long bloom time, and they are great as a cut flower as well, lasting several weeks.)

•Larger bulbs produce more flowers (and often send off new baby bulbs!)

•Always store un-planted bulbs in a cool place between 40-50 deg. F.  (I pull mine out of the soil in late summer after they've been in the garden so they can develop foliage then store them in the garage in sawdust to keep them dry.)

After Bloom Care:

After-Flowering. After the amaryllis has stopped flowering, it can be made to flower again.  Cut the old flowers from the stem after flowering, and when the stem starts to sag, cut it back to the top of the bulb.


Leaf Growth and Development.  Continue to water and fertilize as normal all summer, or for at least 5-6 months, allowing the leaves to fully develop and grow.  When the leaves begin to yellow, which normally occurs in the early fall, cut the leaves back to about 2 inches from the top of the bulb and remove the bulb from the soil.

Bulb Storage.  Clean the bulb and place it in a cool (40-50 deg. F), dark place such as the crisper of your refrigerator for a minimum of 6 weeks.  Caution: Do not store amaryllis bulbs in a refrigerator that contains apples, this will sterilize the bulbs.  Store the bulbs for a minimum of 6 weeks.

Plant Again. After 6 weeks you may remove bulbs whenever you would like to plant them.  Plant bulbs 8 weeks before you would like them to bloom.

I'll post progress photos as the bulbs develop so you can see them, feel free to share any tales you've had growing bulbs as well.

*Amy

Monday, December 20, 2010

The Smell of Christmas

Ever since Greg and I have been married (5 years for you new blog readers) we have always done a real Christmas tree, usually a Frasier Fir.  They tend to be fat, full, and long lasting against needle drop in our house, they also have a light smell, which I love!

However, not everyone can have a real tree, either for allergies, pets, or just access issues.  So for those of you who can't have the real deal, get on over to your nearest retail outlet to purchase this amazing product line:

I have been a big fan of the Thymes products for a long time and this is no exception.  I have used this as a good holiday go-to hostess gift.  Especially for those living in a warmer climate who can't always get a real tree, this brings the smell of Christmas into the house without the mess!
The diffuser is also a nice gift, I usually have one in the bathroom for the holiday's.  But they do last FOREVER, so you can re-cap it and save it for another year if you don't want to smell the holiday's into Valentines day :)


Have you tried these?  Are there any other good scents you use for the holiday season?

Happy Monday!
*Amy

Wednesday, December 15, 2010

18 trees and counting...

So far this year I have set up, light and or decorated 18 trees, whew.  I think I am MORE than Christmased up this year!

Please excuse the exit sign, photoshop is obviously not in my skill set...yet!


This is a tree I did for a local restaurant called 2941.  We did the planting, patios, ponds, etc. for the restaurant several years ago and I have been decorating their tree for many years as well.  VERY EARLY in the morning the day after Thanksgiving I head over to make some holiday magic happen.

Without further ado...


Here's the tree topper, I used a bunch of branches that had nests, berries, and flowers in it to help give the tree some height and whimsy. 
Here is the middle of the tree, I tied ribbon in that matched the carpet of the restaurant for a modern look.  I know, a lot of people thought it was an odd color combo, but I think it was funky and fun!

And I'm STLL decorating!!  More photos to come tomorrow, so stay tuned!  Are you done decorating?  Do you have a "commercial" looking tree such as this one or are you more traditional with your family ornaments?  I'd love to know!

*Amy
Thursday, December 9, 2010

Don't mind the glitter...

One of the many awesome aspects of my job is when it gets super cold (as it is now) my planting jobs slow down, SO I get to transition to Christmas decorating!!  Usually I help set up many of the themed trees in our stores.  This year I was so busy installing jobs (good news) I didn't help much (bad news).  However, since we have a lot of amazing customers we've worked with for years I get to go and decorate their houses (great news!)
This was a mantle I did for a customer's formal living room.  We used a mixed evergren garland, wide gold ribbon, thin red firefly ribbon, matte and shiny red balls and some glittery holly garland I cut into peices and stuck throughout for some *BLING* factor.

I will post the photos of their family room mantle tomorrow along with their tree.

I'm off to decorate another house today!

Happy Holidays!
*Amy

Wednesday, December 1, 2010

Thankful

Wow, I did not intend to be gone from blogging for so long, turns out my "cold" was bronchitis and I was put on bed rest for several days.  You would think I'd be all inspired to blog and even get some extra posts together right?  I wish!  I was so tired all I did was sleep and cough, oh and host 9 family members for Thanksgiving :)

Even feeling under the weather, I managed to whip up some flowers for our Thanksgiving day table, I can't pass up an opportunity to do some beautiful flowers for family and friends.  I dropped one off at a girlfriends house for her table as well.  Spreading a little bit of happiness to those we're thankful for is what this season's all about!
I like to clean all the stems, removing leaves, thorns, etc. and lay each flower in a pile so I can just grab and go!  My pruners are amazing, I have a pair with me all the time, no kidding, they're in my car right now :) 
Here's the finished product, yellow sunflowers, babe orange spray roses, purple delphinium, purple statice, green hydrangea, one yellow lemon and two mini-crab apples, finished off with some salal leaves. 
I took a walk Thanksgiving morning to hunt for pine cones for the table and wrote out each guests name on a piece of orange construction paper (supposed to be leaves) as individual place cards. 
Here was the table before the pine cone place cards and wineglasses.
Mmm, Turkey in the oven!!  He was a DELICIOUS bird!  Thanks Kath!
Our pie selection, apple, pumpkin and pecan, all were good, but the pecan was my fave!

I hope you all had a wonderful holiday with family and friends.  I am back in action now and will be posting regularly!  So please say hi!  I am thankful to have fellow bloggers!

*Amy

Friday, November 19, 2010

Wedding Bouquets

First things first, when getting inspired to do flowers you must be well-caffeinated...Starbucks run!
Now that we had our priorities in order it was time to start in on the bouquets! 
Craspedia also called Billy Balls were a tad too yellow for my color palate, so I just hit them with a few light mists of design master orange spray paint.  That got them to the shade I wanted! 
Tina had all the flowers read to go in buckets grouped by flower.  She had stripped all the leaves and re cut the stems so they were fresh and ready to go.  It's so much easier to have things grouped so you can just grab what you need.  Bouquets go quickly when you're in progress and with a handful of flowers there is little time to stop and re-group.
Here is Wendy's bouquet, we added Purple Anemone to hers along with those COOL ferns, they were artificial but no one knew!  To the right of the fern is the orange protea and below that is purple lisianthus.  Above the anemone is freesia, the green hydrangea and then the billy ball to the left.  Another purple lisianthus and then an orange rose finish off this side. 
I am a detail oriented person and wanted a way to distinguish the bridesmaids from the maid and matron of honor, so I found this amazing silk ribbon in orange, one of Wendy's colors and Tina found pins to offset the wrap. 
And here is the green velvet ribbon with orange pins for the maid and matron of honor.  After the wedding the matron of honor came up to me and told me she was so nervous she was rubbing the velvet to help calm her nerves.  That is EXACTLY why I chose that ribbon, I'm so glad she used it the way I intended!
And here is the bride's wrap, yes, it's a little busy, but she LOVES funky!  I used an eggplant velvet, which was the same color as the girls dresses.  Green is her favorite color, so I incorporated those for the pins, and the copper cord was too cool to pass up!  I also tied her father's wedding ring into the bouquet, he lost a long battle with cancer 10 years ago this summer. Both Wen and her mom knew they couldn't get through all the emotions of the day and bring his name up, so they had beautiful subtle ways for him to be with them throughout the night.  She also told me she was rubbing the ring as she walked down the aisle. 
Here are Tina and I, I can't remember if that was pre or post caffeine...Hmmm... 
And here were all the bouquets loaded up and ready to go!

Hope you enjoyed seeing the process, I sure enjoyed doing them!  Working with Tina is a blast, she has taught me a TON.

*Amy

Thursday, November 18, 2010

Under the Weather

So I woke up with a scratchy throat and stuffy ears for the second day in a row, boo for fall colds.  Of course this is the week I have crews running two jobs each day-yikes!  I'm sorry I haven't posted the promised photos from the wedding, but I will do it tomorrow, it'll be a Friday treat.

For now I'm off to lay out plants in Alexandria and then off to meet some prospective customers, hope I don't sneeze on them.

*Amy

Image from here

Monday, November 15, 2010

In Vino Veritas

In Wine (there is) Truth, a great saying, also appropriate for this post, as Veritas in Afton, VA was the vineyard Wendy and Jason were married at on Saturday.  And the truth is the wedding was AMAZING!
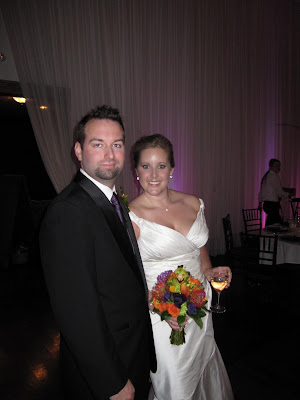
Groom & Bride!!

It was a GORGEOUS day, sunny and warm, and thankfully still great fall color!  A cool sculpture at the entrance to the vineyard with some of their vines in the background.
Greg & I loaded up the Suburban (work car) and drove from Fairfax down to Wintergreen to do all the setup.  I will show you all the progress photos throughout the week, but I thought EVERYONE wants to see the final product first!  Right?

The wedding was held outside on the deck of the vineyard at 6 p.m.  There were beautiful bistro lights strung over our seats and there was a great fire roaring in the stone fireplace.
It was a beautiful setting, intimate, romantic and perfect for Wendy & Jason.  The ceremony was very personal, lighthearted and fun.  It was so nice to see the vows they said be so specific to their relationship.
The cocktail hour was held in the tasting room.  The gnarled wood tables made a perfect backdrop for the modern floral arrangements, purple dendrobium orchids, mango & picasso calla lilies and a little ruscus for some greenery.
Here is one of my moss W's for their new last name on the corner of the bar.
On the gift table I brought along this cool birdcage, tied some purple-black feathers into the orange bow and lined the bottom of the cage with moss.  Behind the birdcage I set a tall glass vase with purple and clear underwater lights and purple and clear glass marbles.  They are showing off the submerged Cymbidium orchid.  I also made these birch tea light holders, another DIY for later this week.
The escort card table.  I brought along some birch logs to separate every few rows of cards.  I think a whole table of cards is a little boring, plus, the texture of the bark is awesome!  Wendy & Jason had family photos on the table of their parents' weddings and loved ones who had passed away.  Such a thoughtful detail that everyone loved seeing.
Two of Wendy's gorgeous bridesmaids holding their bouquets!  I was so thrilled everyone loved the flowers, and man did those dresses make those flowers POP!
 
The reception!!  Man oh man was I happy to see it all finished!  Greg blew up the balloons while I did all the other setup.  Of course when we were working it was daylight, so we didn't get the full effect until we walked in with all the other guests.  But the reactions were amazing!  I found these 3' balloons in NYC and they were a big hit.  Not only did they created awesome shadows on the walls, but they brought a sense of fun and whimsy to the party, exactly what Wendy & Jason wanted.
These were the tall arrangements, we alternated tables of high and low to get a big effect and still allow people to talk over and through the arrangements.  These were the copper branches (a post earlier this fall).  I tucked dendrobium orchids into some of the branch crotches for some pops of purple.  The amber glass votives were from NYC as well, and really added another layer of glowing light to the room.
And here were the low table arrangements.  Again, I'll post the progress photos this week.  Wendy named all the tables after their favorite ski slopes on Wintergreen mountain.  Each escort card had a note explaining that on the back.  Amazing attention to detail, but that's what makes an event so special and personal.
Wedding cake!!  I loved the rough textured ridges on the layers and I LOVED the rosettes along the front.  Watching her assemble the cake was very cool, and I was glad she used the extra flowers I brought along.  Also loved the log as the cake stand, so glad she carried through the natural elements! 
Groom's cake, Jason LOVES Captain America, so Wendy surprised him with a custom cake.  He was thrilled! 
 
To wrap up the night Wendy & Jason did a sparkler sendoff.  A fun, festive way to close out a great evening and one HECK of a party!!

Congratulations to you both, we wish you many years of happiness, health, laughs and love!
Thanks for letting us be a part of your big day!

XO
*Amy